Where to Work?
If you plan to repair and clean vintage electronics give some thought to where you will work. While many boomers are downsizing as our nests empty some of us are turning empty kids’ bedrooms into hobby rooms. The third parking space in a garage can become a nice workshop, especially if insulated, heated and air-conditioned.
The Minimalist’s Bench
At a minimum, you need about a three-foot by five-foot, well-lit workspace with a chair or stool of appropriate height. You will want a way to store parts and organize a small collection of hand tools. You will need access to electricity for a soldering iron.
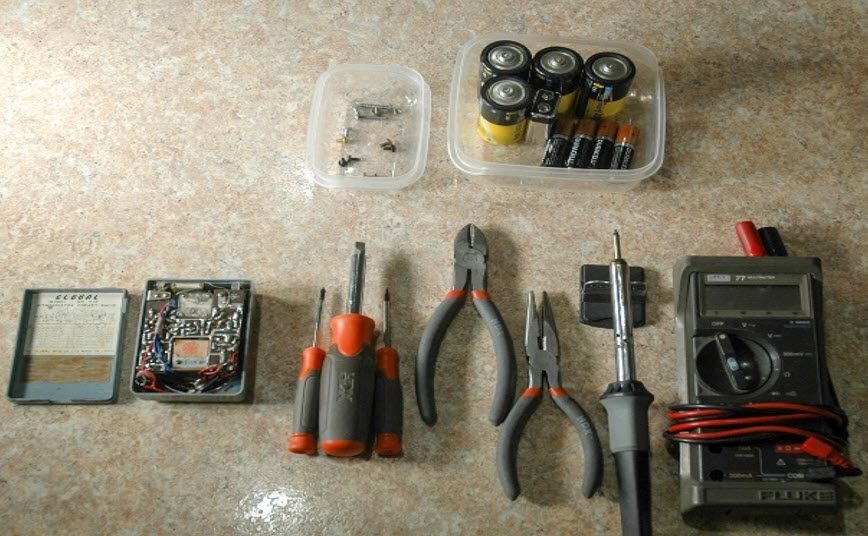
About the only other things you might need are a multimeter, test speaker and some way to magnify close work. The truth is that you can do excellent transistor radio repair work in a breakfast nook or in a motorhome or at a card table. I did something like this for about three years when I spent time camping and exploring in a vintage Airstream trailer.
Just put your tools into a portable toolbox and get yourself a portable parts bin. Do make sure any work surface you use is flat and easy to keep clean since small pieces of dirt can scratch, and therefore damage plastic radio cases and metal grills. If you use the same table for meals that you use for soldering, clean it carefully to remove lead solder residue.
Going All Out
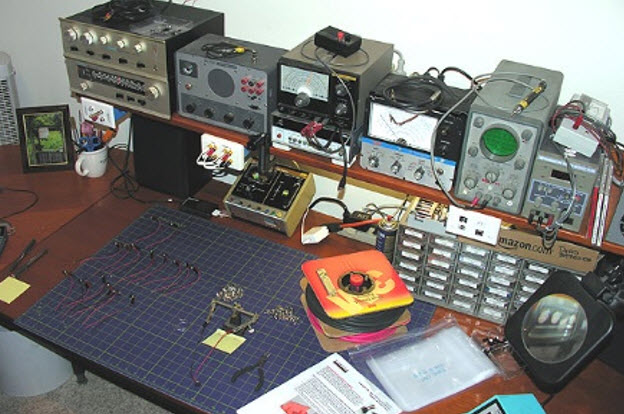
At the opposite end of the spectrum is a fully-equipped bench like the one here. It has more than enough test equipment to troubleshoot any analog consumer electronic device you will likely encounter.
The top row (from left to right) contains vintage Dynakit audio gear for entertainment and audio troubleshooting, an old Allied signal tracer, an RF signal generator with frequency counter beneath it, an analog Eico Volt-ohmmeter, Heathkit oscilloscope, and DC power supply. Below that test speakers, a transistor tester and parts.
That little white patch panel under the signal tracer makes it easy to connect the test speakers and also gives easy access to inputs and outputs on the Dyna gear.
Notice also the thick plastic bench protector/cutting board. It’s a lifesaver!
If you want to repair vintage televisions and FM radios you will probably want to add a video generator, FM Stereo simulator and other pieces. Digital troubleshooting will require newer, more advanced equipment.
You need not, and probably should not start out this encumbered. And, unless you enjoy collecting (and constantly repairing) vintage test equipment, you can save time and money by acquiring the contemporary solid-state test gear. This will reduce the time spent troubleshooting your troubleshooting instruments. You'll probably have more confidence in the readings you see as well.
Something in the Middle?
Here's part of my current setup in the corner of our home office. It doubles as a "product photo" area. The whole space is four-feet square-around 100-square feet.
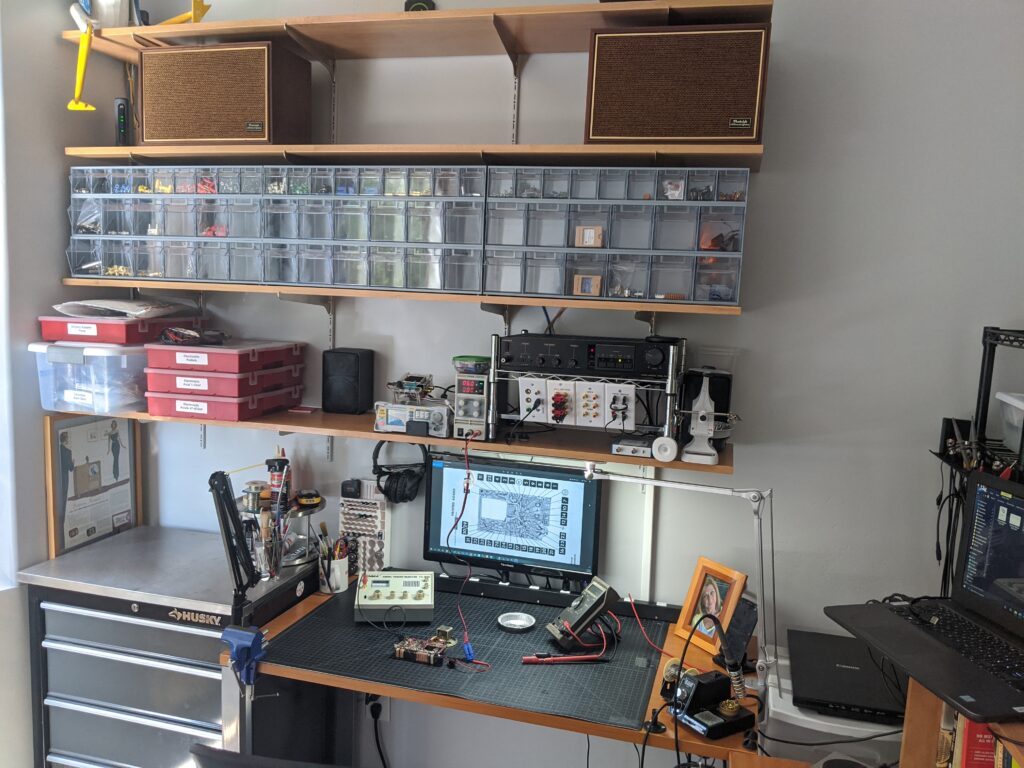
The bench has the usual soldering and desoldering gear, a variable DC power supply, solid state signal tracer, signal generator, notebook-PC-based oscilloscope, a magnified "third-hand," and a sturdy plastic cutting board to protect the wooden desk. Supplies, test leads, contact cleaner, smaller test equipment such as meters, and additional tools are stored on the shelves above the desk and in drawers underneath it.
An ideal electronics bench is big enough to hold at least one project, (and perhaps two), neatly spread out; but not so big that you are tempted to use it as storage area/dump. Staying clean and organized can make a huge difference in your success rate, and will make bench work a lot more fun.
One Workspace, or Two?
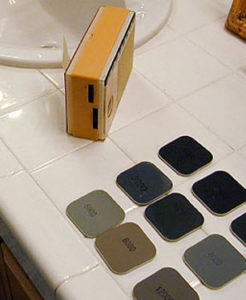
If you have the space for it, I recommend two workspaces—one for electronic repairs and another for cleaning, polishing and such. Besides simplifying the organization of your tools, this approach minimizes the chance of accidentally damaging things.
For example, the cleaning/polishing process requires liquids that can spill, sandpaper grit that can scratch perfect plastic finishes if left on the bench, and so on.
IF YOU HAVE A GUEST BATHROOM WITH A SINK AND SOME EXTRA CABINET SPACE THIS CAN MAKE AN IDEA CLEANING/POLISHING AREA.
Ideally your cleaning and polishing work area should be near water. The electronics bench will not profit at all from proximity to a sink.
Moreover, two workspaces also enable you to have more than one project underway simultaneously. 'Run out if ideas on that weak playing radio? Go polish a different one while you mull things over.
Somewhere Else Entirely?
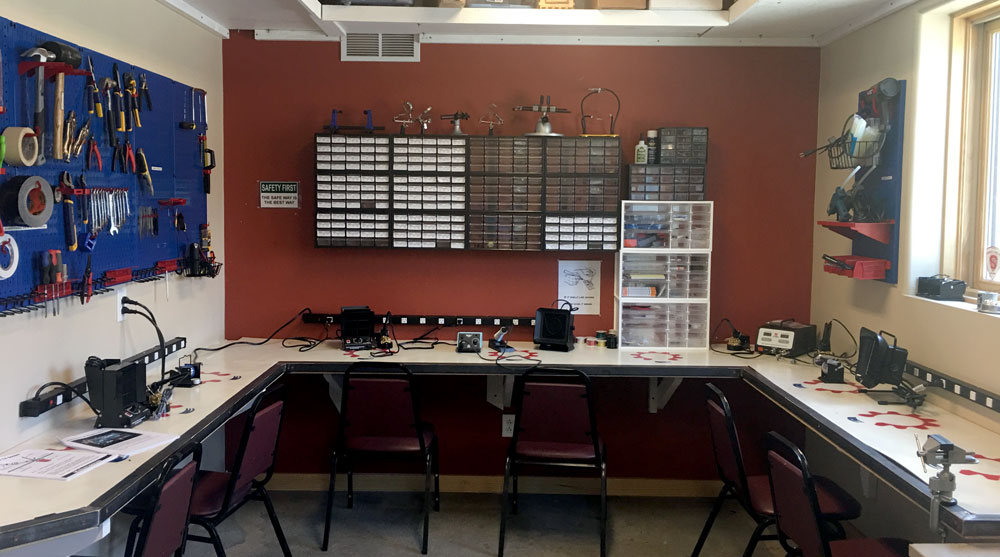
Or how about this? Some place other than your own. Maker Labs are popping up all over the place. They are shared workspaces funded and maintained by people who love to make things.
This is a photo of the electronics lab of the MakerLab in Durango, Colorado. Besides getting access to tools, test equipment and even low cost supplies, these labs provide a social setting where you can meet like-minded friends. You might also find 3D, and learn how to use printers, CNC machines, Laser cutters, and much more.
Be the first to comment