Chrome Without the… ahh, Metal
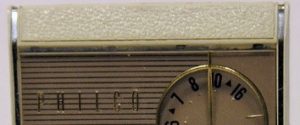 In the late sixties and early seventies many radio manufacturers went on a cost reduction diet. This meant replacing metal with plastic whenever possible. The most annoying downside of this was “plastic chrome.” It looked fine, albeit cheap when brand new, but quickly wore off, revealing the dull colored plastic below. This Philco is an example. Notice how much of the metal-look has worn off. I know of no good way to “buff” this stuff back to a satisfactory shine.
Restoring Metal-look Finishes and Lettering
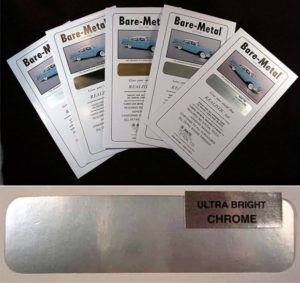
You will need to add a layer of new foil instead. Bare-Metal Foil rubs off and sticks to plastic. The sheets measure 6 x 11.75. A product family called Bare-Metal Foil comes to the rescue. It’s usually a much better solution that painting. Hobbyists often use it on their model car restorations. If you know a model maker who uses Bare Metal, ask if s/he will show you how it’s done.You can purchase Bare Metal at Amazon, local hobby shops and eBay.Colors include Chrome, Ultra Brite Chrome, Black Chrome, Gold, Matte Aluminum, and Real Copper.
Here are the steps:
 Clean the plastic with a moist cloth dipped in a solution of water and little mild dish detergent—Ivory or whatever.
- Use a very sharp (ideally new) X-ACTO #11 knife to cut a strip of foil a little larger than you need. Use a straight edge as a guide.
- Peel off the backing to separate it from the foil.
- Use toothpicks if necessary to tuck in the foil.Apply the foil to the clean, dry plastic surface. Tweezers or small needle nose pliers are a big help here.
- Trim excess foil with the X-ACTO being very careful to not scratch the radio anywhere.
- Use a flat toothpick or other soft, smooth tool to ensure tight adhesion.
- Burnish the foil with a cloth.
Restoring Worn Lettering
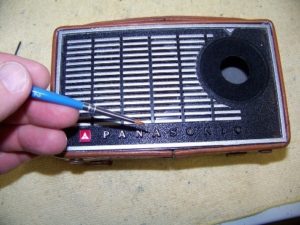 Lettering on the faces and backs of old radios is easily worn off by years of handling. The color variations seem endless.
If you have a steady hand, the right color paint and some tiny, micro paintbrushes you can bring faded words and backgrounds back to life.
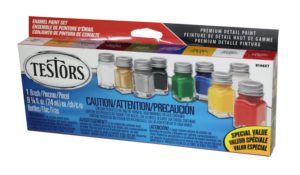
Either purchase individual colors from the local model shop as necessity dictates, or consider purchasing a set of colors like the ones offered by Testors or Tamiya.
You might want to purchase a set of micro brushes as well, if yo find the one in the Testors kit is too big for you. Again, these are easy to find at local hobby shops or online.
 Plastic Lettering Tips:
- Clean the areas needing paint using a toothpick and soapy water.
- Let it dry.Work under good light, and perhaps a magnifying glass.
- Steady the hand holding the brush with your other hand.
- Consider clear coating the finished work.
Not Your Style?
IF YOU HAVE A FRIEND WHO IS A MODEL BUILDER, CONSIDER PAYING HIM OR HER TO DO PAINT AND PLASTIC WORK FOR YOU. OR PERHAPS TRADE RADIO REPAIR SERVICES FOR PLASTIC WORK. PUT UP A SIGN ON HOBBY SHOP BULLETIN BOARDS.
What Do You Think?
Do you have tips and experiences to share? Questions? Suggested corrections or additions? Leave a comment below. I’ll review comments and post or incorporate the most useful ones. Your email address is required if you choose to comment, but it will not be shared.
Be the first to comment