Before You Start ...
Some cleaning and crack repair projects require removal of the circuit board, and perhaps other components. Any time you open a collectible radio you run the risk of damaging it. You assume all the risks, even if you follow these instructions exactly.
It is very easy to break fragile old wires, damage grills and lettering. These instructions assume you know how to use everyday tools in cramped quarters, or are at least willing to learn.
In rare cases, you might need to unsolder and re-solder something in the process of removing and reinstalling electronics. As a reminder, soldering irons and solder get very hot. Keep them away from children. Consider wearing eye protection. Unplug your iron when away from the work area. Solder contains lead.
Helpful Cleaning Products
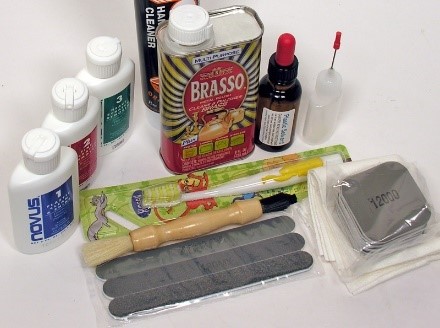
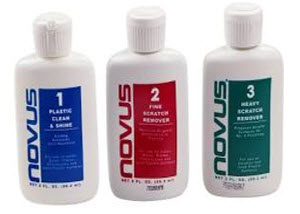
The illustration shows some cleaning and polishing products you’ll probably want to keep on hand. These include:
- Novus polish
- Brasso metal polish
- MicroMesh polishing pads
- Clean wipes
- Plas-T-Pair plastic repair items (for cracks and chips)
- If you want to repair sun damage, you will also want 12% (40V) Hydrogen Peroxide solution and/or paste
Cleaning Grills and Tight Spots
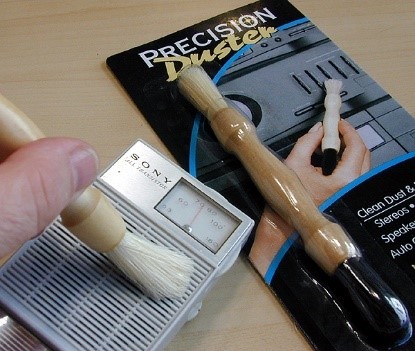
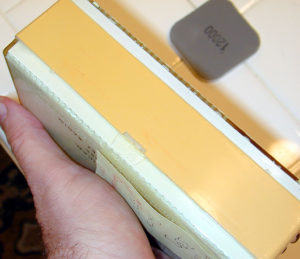
NOTE: For soft plastics like the clear plastic found on tuning dial faces and on really inexpensive, fragile sets such as the Boy’s models, either avoid using brushes completely or use a “Baby Soft” wipe.A soft brush that can be used to get the dirt out of plastic and metal grills, the holes on the back of sets and other grooved places. The white bristles are “medium” stiffness the black ones are very stiff. When using this brush be careful not to damage whatever is behind the openings. On some radios, the speaker is exposed back there. Others contain grill cloth, perhaps with gold accent fibers and other things that can be easily damaged with a brush. When in doubt, remove the electronics and grill cloth from the radio case before using a brush of any kind.
For example, volume control knobs on Zenith 500H radios are very easy to scratch.
NOTE: For soft plastics like the clear plastic found on tuning dial faces and on really inexpensive, fragile sets such as the Boy’s models, either avoid using brushes completely or use a “Baby Soft” wipe.
A soft brush that can be used to get the dirt out of plastic and metal grills, the holes on the back of sets and other grooved places. The white bristles are “medium” stiffness the black ones are very stiff. When using this brush be careful not to damage whatever is behind the openings. On some radios, the speaker is exposed back there. Others contain grill cloth, perhaps with gold accent fibers and other things that can be easily damaged with a brush. When in doubt, remove the electronics and grill cloth from the radio case before using a brush of any kind.
For example, volume control knobs on Zenith 500H radios are very easy to scratch.
The black, stiffer brush end on the two-sided brush shown above is handy for clearing out cobwebs from the inside of sets, and for removing dirt and solder splatters from printed circuit boards. Using it on surface plastic is risky, and not advised.
While it is possible to get the dirt and dust out of those tiny cracks on the edges of volume control and tuning knobs by using a toothbrush and some 409 or liquid dish detergent, you might find it worthwhile to invest in a small ultrasonic cleaner if you plan to do a lot of restoration and cleaning work.
Ultrasonic Cleaners
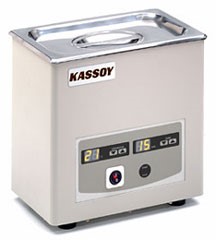
You can either purchase a new product designed for jewelry and eyeglass cleaning, or search eBay for surplus industrial units. The home jewelry cleaners are usually less expensive than industrial models, but the industrial cleaners generally have bigger tanks, making it possible to clean larger parts. They also tend to clean more quickly.
I found a used industrial unit at a flea market for under $50.00 and it has served me well for years.
While you can purchase ultrasonic cleaning solution on the Internet it is expensive, especially when you add shipping costs. I find Windex works just as well, and is quite inexpensive when purchased in large containers from Costco and the like.
Removing Deep Scratches & Marks
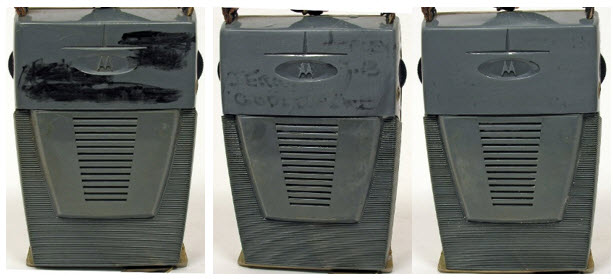
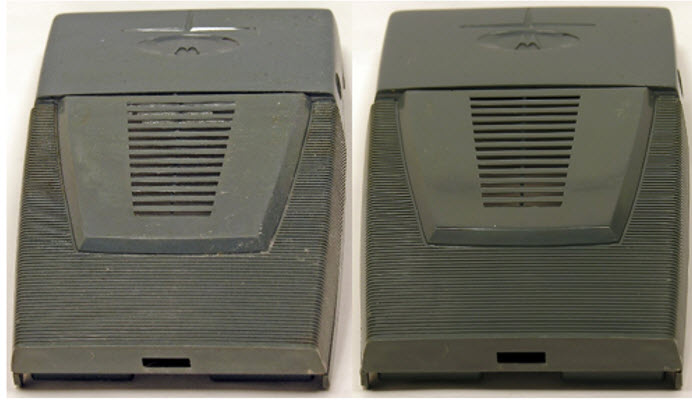
Sometimes dirt, scratches and scuffs are tough to remove. Look at this old gray Motorola. It has what appears to be Magic marker on it, and, to add insult to injury, underneath the top layer is a second layer of ink. The three progressive photos show you the results of using 409 and then an initial sanding using a course MicroMesh pad. Notice also the dirt in the ridges on the lower portion of this radio.
I started by soaking a rag with 409 cleaner and rubbing the black areas. I repeated the process about five times over perhaps ten-minutes and got the radio to the condition you see in the center photo. At that point, it became clear that sanding would be required.
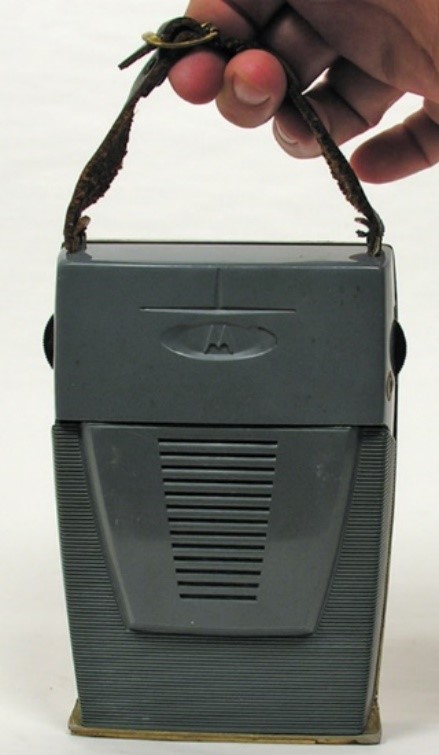
I also decided to clean the ridges on the back in the ultrasonic cleaner and restore the front metal with Brasso. (This required removing the radio from the case.) Read about that here.
The left-most photo shows the result of follow-up sanding of the top part of the radio for about a half-hour with a variety of MicroMesh sanding pads using the techniques described in a moment. The right photo shows the back after ultrasonic cleaning and the application of all three Novus polishing liquids.
The final shot shows the reassembled radio’s back. As you can see by looking back at the “before” photo, it was an hour’s time well spent. Let’s look at sanding in more detail.
Sanding
Sanding is a reasonably drastic step and something that should be approached with caution. You can either make a radio look like new again or totally destroy it. Practice sanding a few inexpensive radios that you don’t mind damaging before attempting to sand something of value! Here are some more considerations:
Plastic discolors over time and sanding part of a radio often reveals the original color. This might make it necessary to sand the entire radio, or have the radio exhibit obvious color differences in the places you have sanded. Some areas, (such as those ridges in the illustrations) are impossible to sand.
If you are not careful you can actually change the shape of a radio by sanding it, rounding-off previously straight edges, creating gaps where the back and front pieces meet and so on.
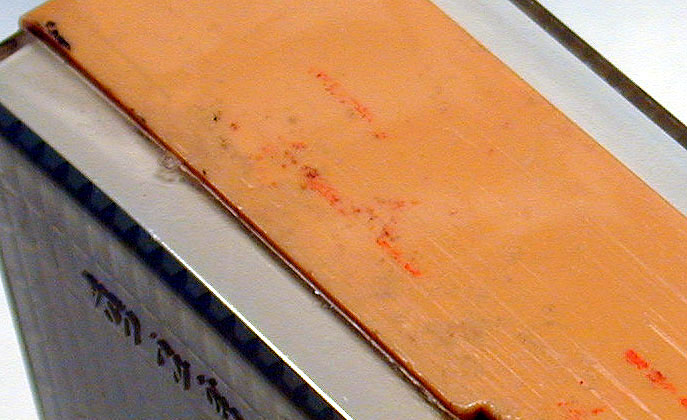
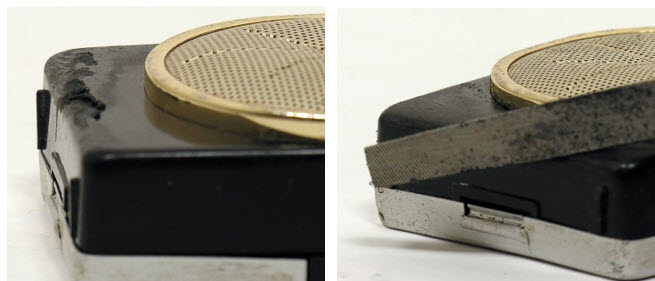
While sanding is the only way to remove deep nicks and scratches, the process can also create deep scratches if you do not work carefully. Consider the poor old Emerson.
Sanding requires patience. If you are tired, put it off for another day. Begin by setting up a clean workspace, near a sink, if at all possible. Clean the radio with 409 or other cleaning solution and then rinse.

Line up your MicroMesh sanding pads or sticks from coarse (1,800) to fine (12,000). Always keep the pads separated since grit from course pads can contaminate the finer ones, and you can scratch the plastic as you move from coarse to fine if there is coarse grit on the fine pads.
As shown below, wet your coarsest sanding pad (1,800, perhaps) and gently rub back and forth in straight lines in one direction—up and down, for example. Wipe the plastic with a clean, moist tissue.
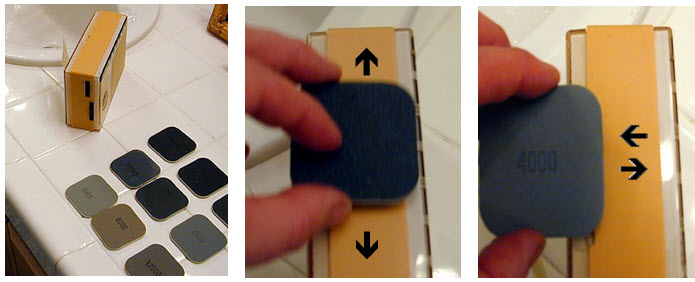
Wet and use the next finest pad in the opposite direction—right and left. Wipe with a different moist tissue. Keep wiping, wetting, and sanding until you reach the finest grit, (12,000, for example) or until the marks are gone.
Examine Your Work Carefully
After you have sanded your heart out, take a critical look under good light. There should be no deep scratches, just some wispy, visible lines perhaps. If you get to this point you can probably move on to a very Next try a light buffing using Brasso, followed by a complete sequence of Novus liquid products. If you can feel scratches with your fingernails you should probably sand some more beginning with a grit in the middle—grade 3600, perhaps, and repeat the progressive process. Once you are happy, finish up with the Novus treatment described next.
The Full 3-Step Novus Treatment
The readily-available Novus 7100 Plastic Cleaner, Polisher, and Scratch Remover Kit contains a paste and two liquids. Two polishing cloths are included as well.
- Start with Novus 3 Heavy Scratch Remover. It’s a paste. Apply a little Number 3 to a clean soft cloth and gently but firmly polish against the grain of the scratches. Keep the cloth moist with Novus 3. When finished, use a different, clean cloth to buff and remove all the Number 3.
- Shake the Novus 2 bottle, Fine Scratch Remover. It contains a liquid that needs to be mixed. Squirt the liquid onto the plastic being careful not to soak the speaker or other electronics. Polish with a clean soft cloth against the grain of any remaining scratches. Pour on some more and with a clean part of the cloth buff again, in circular motions this time. Buff till it shines and is dry.
- Shake the Novus 1 bottle (Plastic Clean & Shine) then apply a small amount and buff using the techniques described in step 2. Compare the first photo with the final results. Ahh. That’s better! Look back at the “Before” and compare.
Label Goo and Paint Removal
Old price stickers and other labels can detract from a radio’s appearance. Some, however, like those from the factory might add value, so think twice before removing something potentially nostalgic.
If you decide to remove labels try lanolin-based products like Goop or others containing lotion that will soften the adhesive. This stuff can also be used to remove paint spatters from radio surfaces.
Squirt a liberal amount onto the area of interest and rub it into the old label or onto the paint you hope to remove. Let it sit for at least an hour, adding more Goop if it looks like it is drying out. You want the cleaner to soften the adhesive or other dirt.
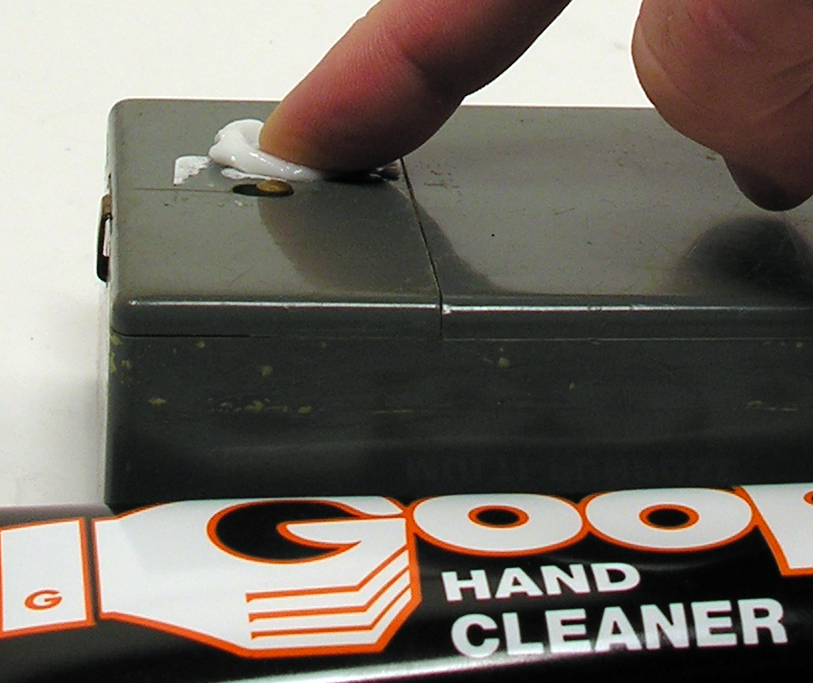
After an hour, try removing the label or paint with your fingernail. You might need to repeat the process more than once to get the desired results.
Filing Plastic
Taking a file to plastic is a last resort, and not for the faint of heart. The objective is to get really rough spots to a point where they can be sanded and then STOP!
Finish by polishing using the techniques described earlier. Here again, practice and care are essential and you will probably ruin your first few radios, so start with parts set.
Look at the example above. The plastic was damaged when I got carried away with a Dremel buffer tool. It melted the plastic. (Note to self: "Never again!" I used a medium flat file and worked slowly. Filing too fast can melt the plastic. Tempting as it might be don’t use a Dremel device in place of a file. After polishing the case looks great.
Be the first to comment