Dial String Mechanisms
Many of the more expensive and interesting mid-century radios have tuning systems utilizing dial cords. They found their way into even the smallest sets.
Some designs are straight-forward, others will remind you of Rube Goldberg. A few are downright elegant.
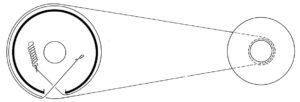
Service documents often contain diagrams like the one shown here.

I have collected hundreds and hundreds of cord diagrams in my over the years, and will eventually post many of them here.
Tips and Tricks
It’s not rocket science, I will grant you, but here are some things I have learned over the years that might be helpful:
Look Before You leap
When working on sets with dial cords use care, and consider taking photos of the whole mechanism just in case, especially if you don’t have a factory diagram as a fallback.
Make notes. You can learn a lot from the damaged cord before you make repairs.
Carefully examine the wheels and pulleys and shafts. Note the number of turns the old string makes around each shaft and wheel.
Size Matters
The diameter of the cord is important. Too skinny and it will slip and/or break too soon. Too fat and it won’t fit the pulleys, shafts, and other components. Typically, cord diameters vary from about 0.2” (~ 0.5mm) to about twice that size, and even a little bigger for older, large table radios.
Material Considerations
Try to use real dial cord material if you can find it, tho it is in pretty short supply. You definitely want something that will not stretch over time.
Tuning Cap Rotation
The position of the tuning capacitor is noted on most diagrams. It is important that you take it into consideration when restringing a dial cord. If the diagram specifies the tuning cap should be clockwise, turn yours fully clockwise before restringing.
The term Open usually means make the tuning cap look like the left photo, while Closed looks like the right photo.

“High” Usually Means Open Some diagrams tell you to turn the cap “to the high end of the band,” or to 1620, or 1600, or whatever. Usually, but not always that means open the tuning cap, probably by turning the capacitor’s shaft clockwise as you look at its front.
Measure the Old String Lay out the old string pieces and use them to get an idea of the replacement length you will need. Cut a little extra to make knot tying easier.
Superglue to the Rescue
A tiny drop of Superglue can help you hold the string parts together while you are tying knots, and can also be used to fasten pointers to strings. Be very careful not to glue the radio parts or yourself in the process.
Whiteout Works Too That typing correction fluid sold in office supply stores can be used to fasten tuning pointers to the string. ‘Gives a nice authentic look too.
Improvise
Can’t find the diagram you need? Chances are some other design is close enough to get you going. For example, an amazing number of pocket portables use this basic recipe:
- Fix one end to the big pulley.
- Make one-half turn around the big pulley and head for the knob shaft.
- Make 1-½, or 2, or 2-½ turns around the tuning knob shaft. (This varies by model. You might need to experiment.),
- Come back to the big pulley, then go all the way around it.
- Finish off with the spring pulled snuggly.
To Avoid Slippage be sure you don’t get oil on the mechanical parts where the string meets the metal or plastic.
Save Old Parts
You will be surprised at how handy a parts drawer filled with dial string, springs and pointers can be. Save stuff. The kids will throw it out when we are gone.
Have fun!
What Do You Think?
Do you have tips and experiences to share? Questions? Suggested corrections or additions? Leave a comment below. I’ll review comments and post or incorporate the most useful ones. Your email address is required if you choose to comment, but it will not be shared.
Great description!!
I re-strung these old radios when they were new.
I have a kenmore kr-6600. Works great. The only thing I’d like to fix is the radio station pointer is about 1/2 inch off. The cord is good and rolls smoothly. How do I adjust the positioning so that the pointer points to the correct station?
i need the dial cord pictorial for a zenith G725